Hey there, fellow rolling enthusiasts! Whether you’re a seasoned pro or new to the reefer game, using a joint roller is a total game-changer. It takes the hassle out of rolling and ensures you’ll blaze like a pro every time. Let’s break it down step-by-step so you can craft those perfect joints with ease.
Why Use a Joint Roller?
First things first—why even bother with a joint roller? Well, for one, they make the whole rolling process a breeze. With a joint roller, you get consistent, perfectly rolled joints every single time. No more lopsided or loose reefers. Plus, it’s super quick, allowing you more time to enjoy your masterpiece.
What You’ll Need
Before we get rolling, gather these essentials:
- Joint roller
- Rolling paper
- Herb of your choice
- Filter tip (optional but recommended)
Step-by-Step Guide
1. Prepare Your Herb
Break down your herb into a fine consistency. This will ensure an even burn and make it easier to roll. If it’s too chunky, your joint might not roll properly.
2. Set Up the Joint Roller
Open your joint roller by sliding the rollers apart. Place a filter tip at one end if you’re using one. This little addition helps keep bits of herb from getting into your mouth and makes for a smoother experience.
3. Load the Herb
Sprinkle your herb evenly along the groove of the roller. Don’t overpack it, as this can make it difficult to roll and might tear your rolling paper.
4. Roll It Up
Close the joint roller by sliding the two rollers back together. Now, gently roll the rollers toward you to form the herb into a cylindrical shape. This step is crucial for getting that perfect roll, so take your time.
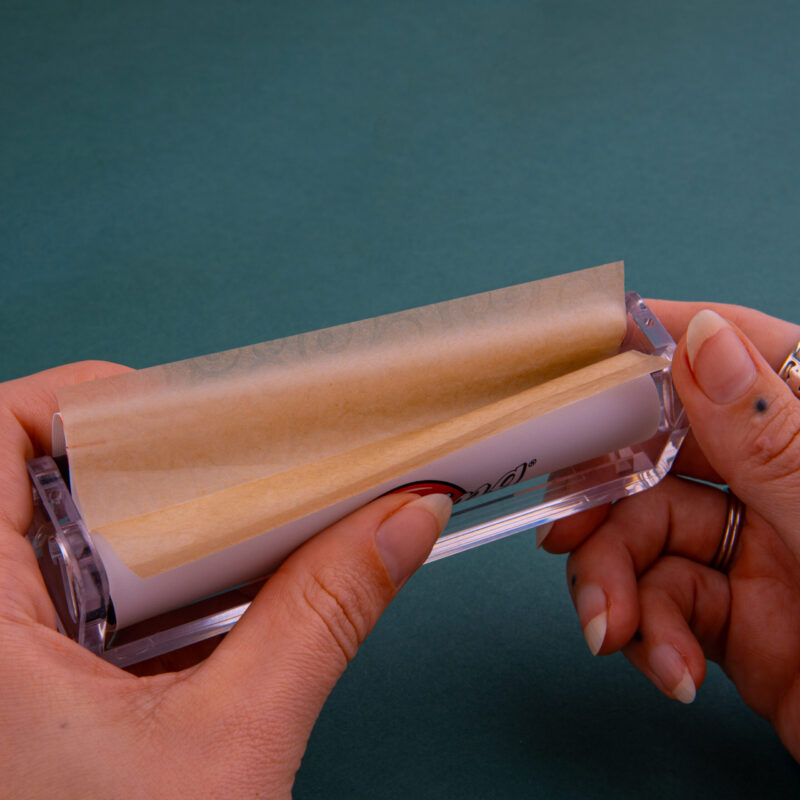
5. Insert the Rolling Paper
Insert a piece of rolling paper into the joint roller with the adhesive side facing you. Make sure it’s aligned correctly and ready to wrap around your herb.
6. Finish the Roll
Continue to roll the rollers toward you, allowing the paper to wrap around the herb. When you see the adhesive strip, lick it to activate the glue and finish rolling.
7. Seal and Enjoy
Slide the joint out of the roller and give it a gentle tap to pack down the herb. Twist the end to seal it, and voilà—you’ve got yourself a perfect reefer ready to blaze!
Tips for Success
- Practice Makes Perfect: Like any skill, rolling takes practice. Don’t get discouraged if your first few joints aren’t perfect.
- Keep It Clean: A clean joint roller works best. Regularly remove any residue to keep it rolling smoothly.
- Use Quality Rolling Papers: Investing in good rolling papers like Greengo can make a big difference in your overall experience.
Join the Community
At Greengo, we’re all about creating a sustainable and enjoyable rolling experience. Share your tips, tricks, and beautiful joints with us on social media using #RollWithUs. We love seeing our community come together to blaze like pros and make eco-friendly choices. 🌿✨
Ready to roll your next reefer with confidence? Grab your joint roller, follow these steps, and you’ll be well on your way to enjoying perfectly rolled joints every time. Feel free to adjust the steps or add your own personal touch. Remember, the key is to enjoy the process and share the love of rolling with others. Happy rolling!
—
